Acha is a gluten free , healthy grain. It is particularly suitable for diabetics as it does not interfere with their sugar levels.
This grain is very versatile as there are various ways you can enjoy it.
Here are various meals you can make with the healthy acha grains.
You can make acha flour into swallow and eat with soup of your choice.
You can make acha grains into stir fry, using fresh peppers , veggies and spices for flavor.
It can be cooked plain like white rice; however it cooks way faster than white rice, so its important to watch it closely while cooking so it does not end up soggy .
It can be made into a breakfast cereal and enjoyed with nut ,milk and fruits.
Acha grains made into flour is suitable for baking.
You can make it into jollof like jollof rice.
Fonio (Acha) Tuwon
Note: So if for any reason you are looking for a healthy replacement for rice or Nigerian swallows (like eba and pounded yam), Acha grains (and flour) is a suitable alternative. Click here to buy acha (fonio) grains as well as acha flour.
Fonio (Acha) Tuwon
Wash acha thoroughly to remove dust and sand. Some can be very sandy.
Put water on fire and allow to boil.
Once boiled, pour in acha and stir a bit. Cover pot half way… allow cook till water dries up and acha is tender.
Turn very well to make a mold. Scoop out and serve with soup. This went down with better Okro soup.
Gbegiri is one delicacy that needs no introduction to my Ibadan people! This Gbegiri soup (beans soup) right here is the truth! Gbegiri is made from beans. It is easy to make, healthy and delicious. It is mostly served with Ewedu Soup and Stew with Amala to make a dish called “Abula”(Abula is simply the combination of amala, ewedu, gbegiri and stew).
HOW TO PREPARE GBEGIRI
I would love to share this two method i use in preparing Gbegiri soup:
1) Make Gbegiri with blender and
2) Make Gbegiri without blender.
Both methods are great and i have detailed both in this recipe. I also included how to make gbegiri video in the recipe card below which is the blender method.
For this recipe, tools you will need include blender or Ijabe (cooking broom), pot, cooking spoon.
INGREDIENTS
1 cup brown or black eyed beans
2 tablespoon palmoil
1 tablespoon locustbeans – Iru
Stock cube
1 tablespoon Cayenne pepper
Salt
Blended Crayfish
Cayenne Pepper
Locust Beans (Iru/Daddawa)
Fresh Beef
Cow Skin (Ponmo)
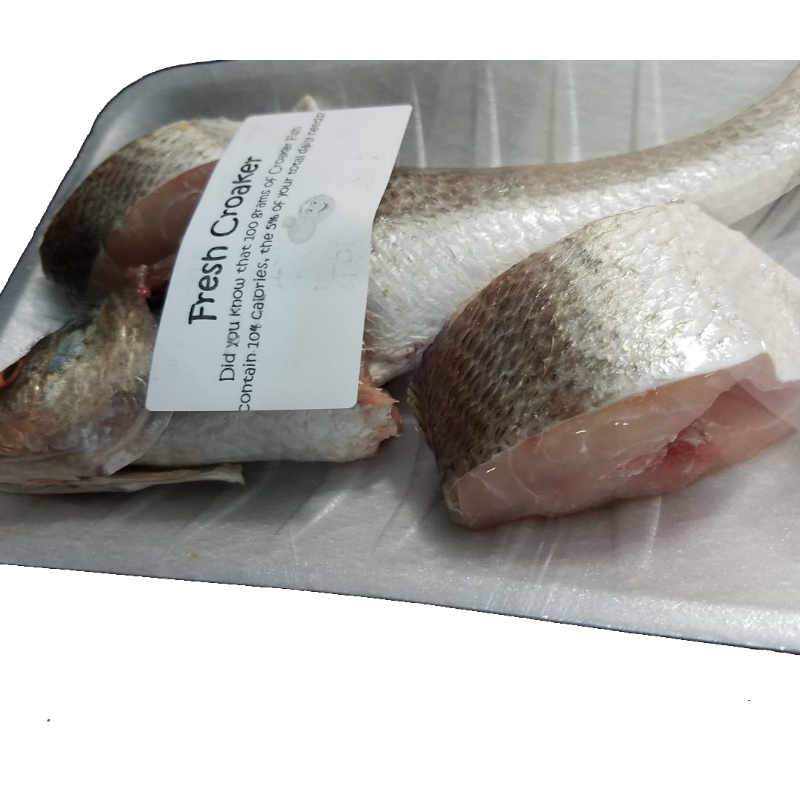
Fresh Croaker Fish
Fresh Titus Fish
“Use either of the fish”
METHODS OF PREPARING GBEGIRI SOUP
Step 1
Peel the beans. Follow our page to learn more about the easiest and fastest way to peel beans- (How to peel beans with blender)
Step 2
Put the beans in a pot or pressure cooker, add water and cook till very soft.
If you do not have a have pressure cooker, you can cook the beans with the regular pot but the cooking time will take longer as the beans has to be cooked till very soft.
White Beans
Honey Beans
Peeled Beans
Beans Puree
You can use either of the beans above!
Step 3
When beans is cooked, take it off heat. This is the point where you decide on the blender method or the Ijabe (cooking broom) method.
METHOD ONE
HOW TO COOK GBEGIRI WITHOUT BLENDER
Let me just state that this is the authentic way of making gbegiri. My Oyo state people know this and this was how my mama taught me. So if you’re going with the authentic recipe, sieve!
If you have very thick consistency of the cooked beans, just add water so it’s much easier to sieve. Be careful not to add too much water as so as not to make the gbegiri too watery. Sieve the beans collecting the liquid in a pot. Move on to step 4
METHOD TWO
HOW TO PREPARE GBEGIRI WITH BLENDER
Pour the cooked beans in blender and blend till smooth. Move on to step 4
Step 4
Pour the sieved or blended beans back on the stove. Add stock cube, locust beans, cayenne pepper, palm oil and salt to taste. Don’t overdo the pamoil. You only need just enough Palm oil to give it colour.
Step 5
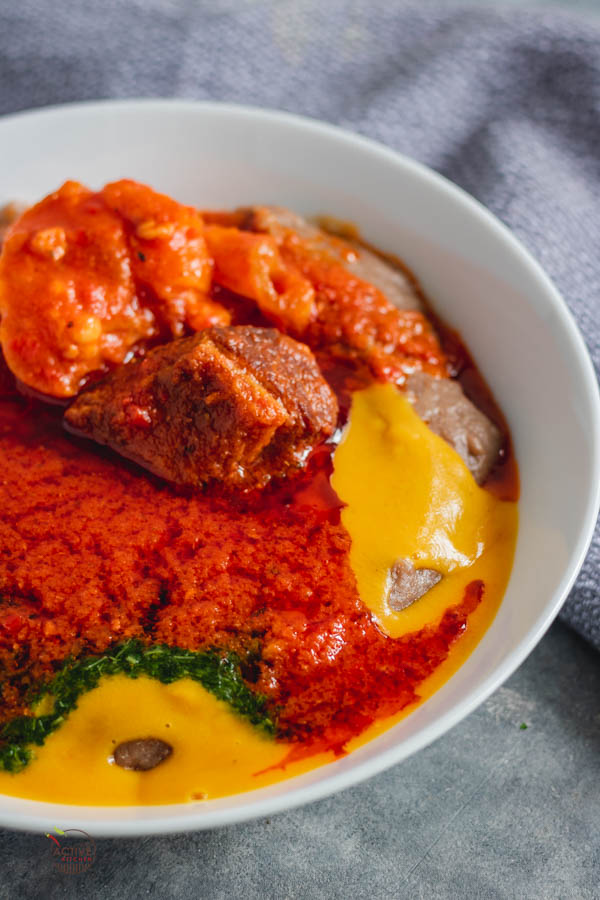
Leave to it to cook for 5 minutes, until all ingredients are well combined. Check for seasoning and salt. Serve with ewedu soup, swallow of choice like amala dudu (blackyam flour), Pounded Yam, Garri or Tuwo and Bula Stew. ***Soup wéh Sweet***😋
Yummilicious Abula Soup Served with Amala
FOLLOW US ON FACEBOOK FOR OTHER NIGERIAN BEANS RECIPES YOU MIGHT LIKE
Kindly subscribe to the blog, share this recipe with your friends (share button below), also tag my Glice & Green Kitchen on Facebook and Instagram. If you try any of our recipes, I would love to read from you all. Without you, there won’t be Glice & Green Kitchen. Thanks for reading🥰❤️
Black Soup is a delicacy from Edo state, Esan to be precise. Guess what? You do not have to be from Edo state before you can enjoy this delicacy. It is easy to prepare.
No worries because what you will see, are ground leaves.
Here is how to cook, Bitter leaf Soup, Ofe-Onugbu / Ofe-Ngbolodi and Efo-Elewuro
INGREDIENTS
Assorted meat
1 bulb of onion
1 cup of scent leaf
2 cups of bitterleaf
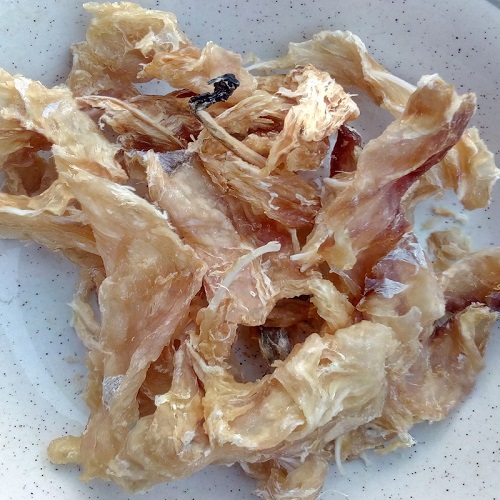
Stock fish
Smoked fish
2 pieces of fresh pepper or 1 spoon of ground pepper
Palm oil or banga sauce
½ cup of ground crayfish
3 seasoning cubes
Salt to taste
Fresh Bitter leaf
Fresh Scent Leaf
Blended Bitter Leaf and Scent Leaf
NOTE: Grind the leaves and set aside
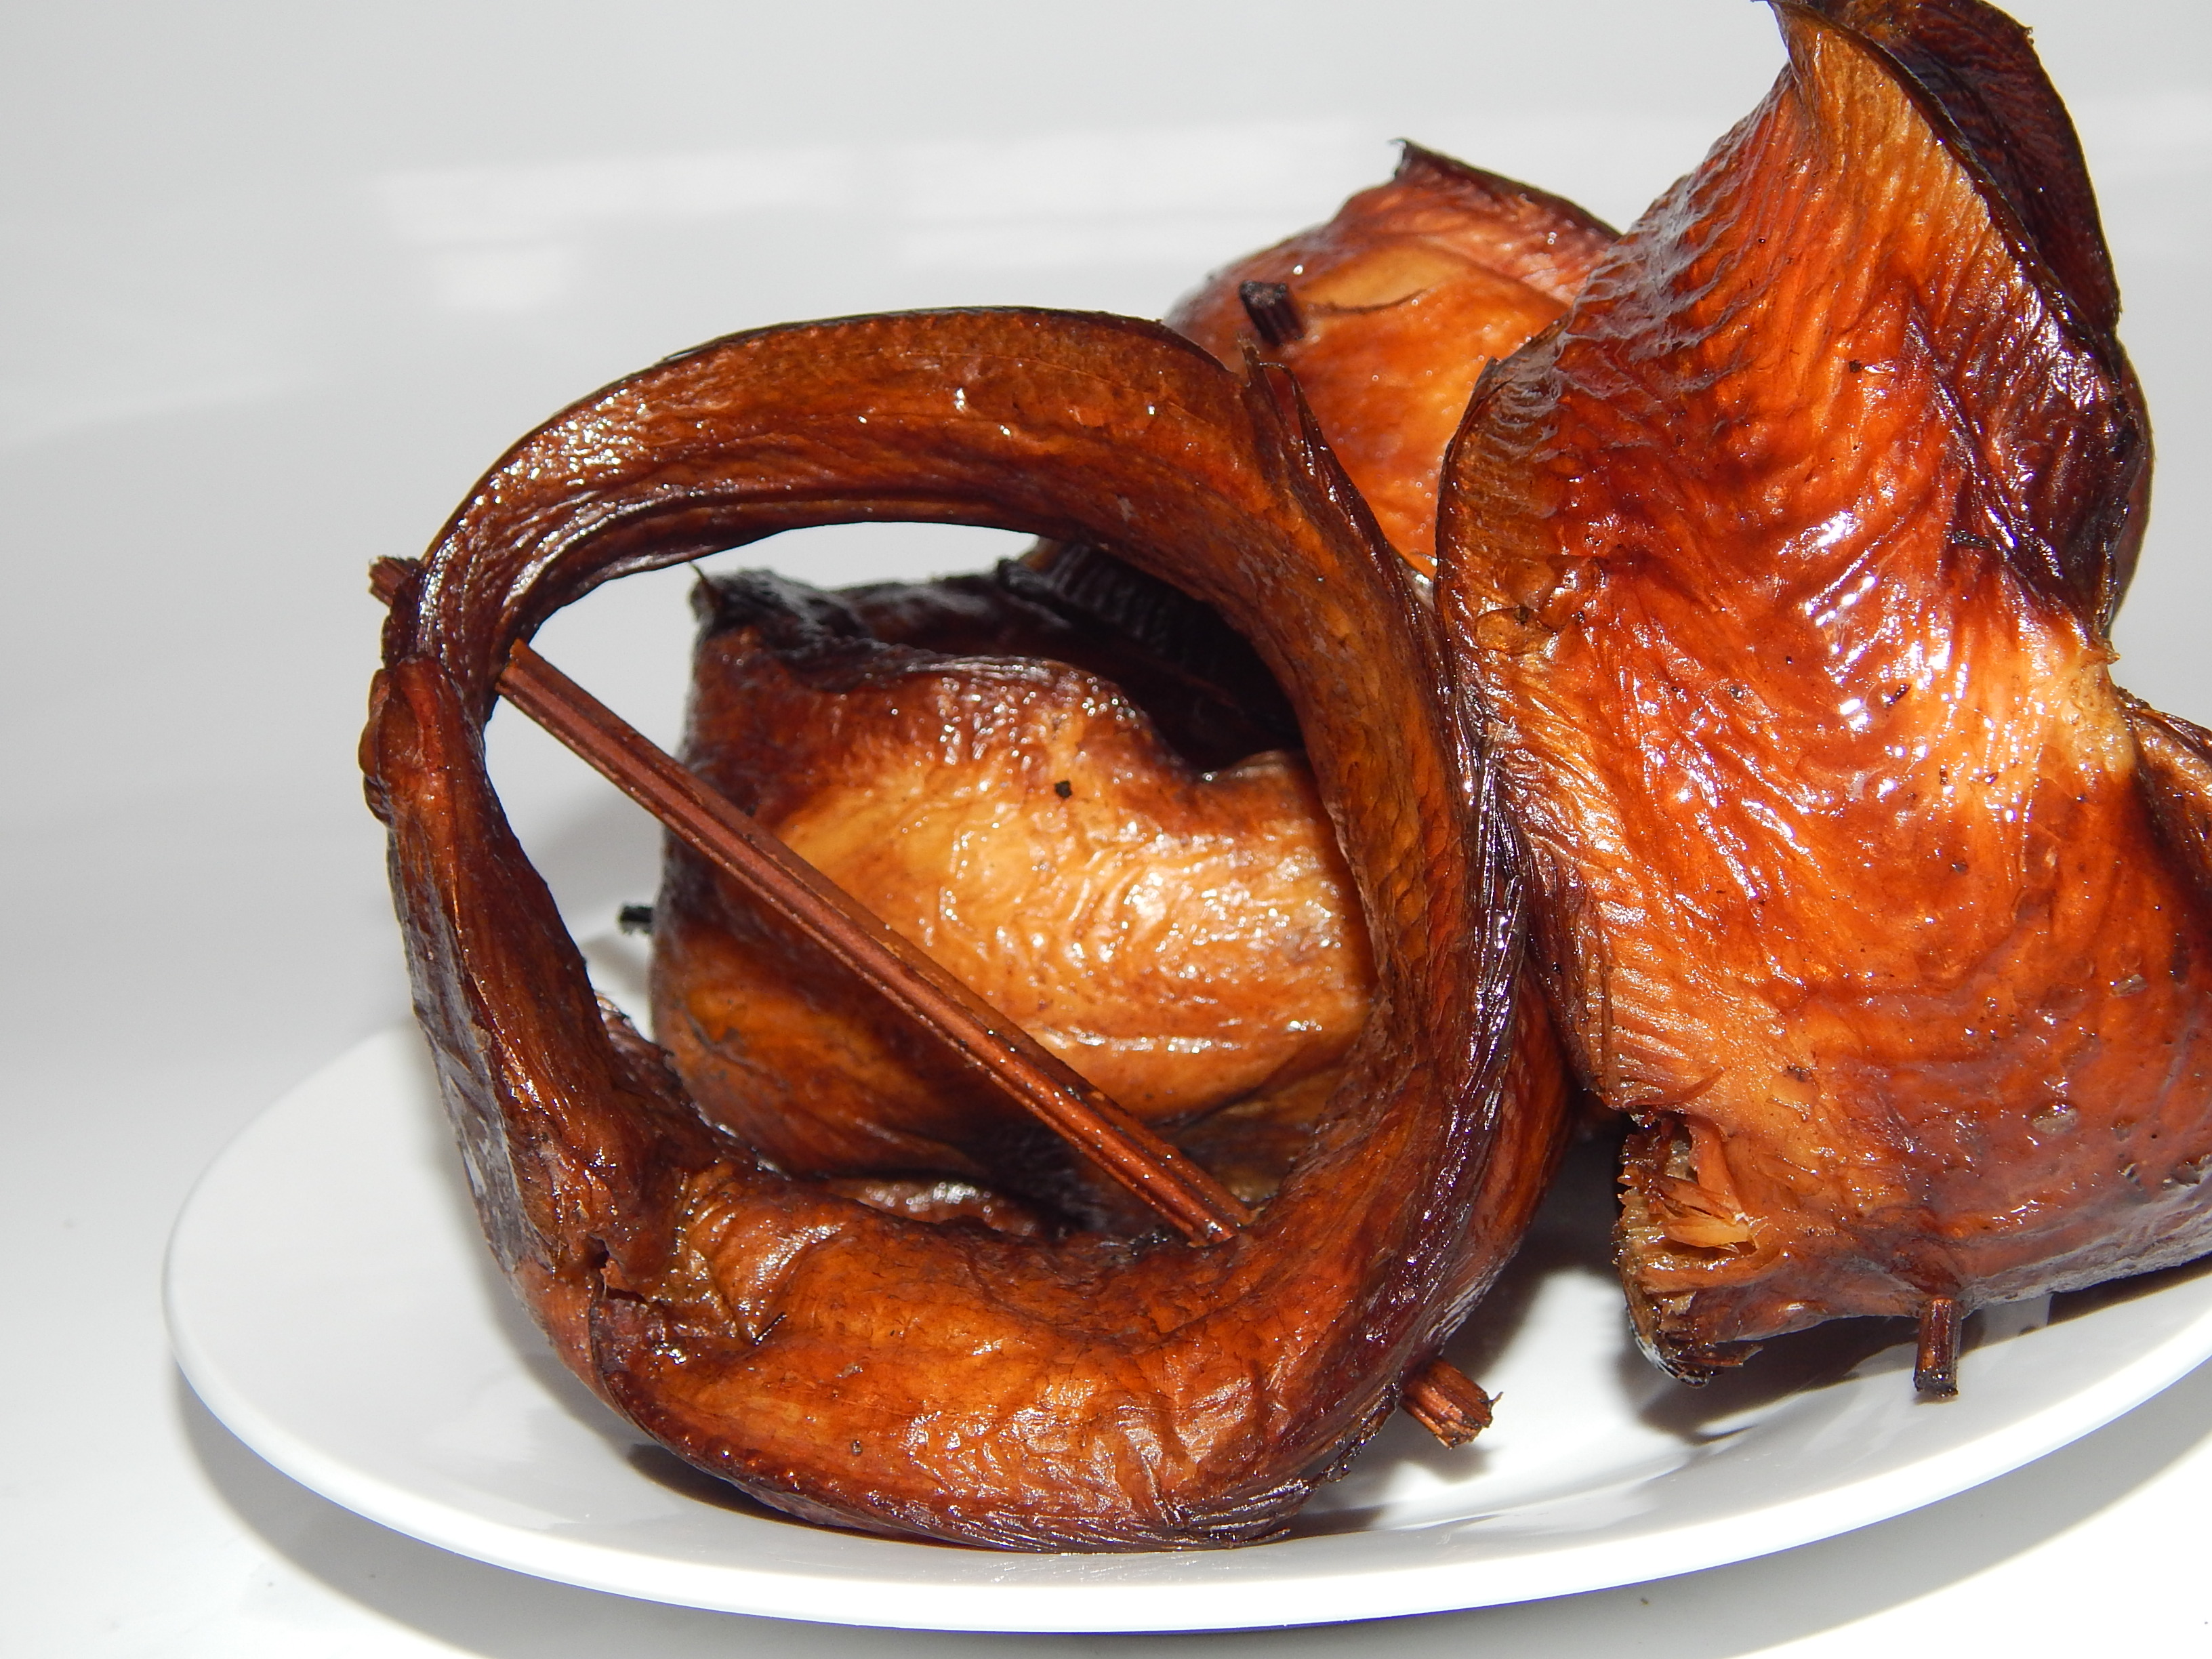
Smoked Titus Fish
Smoked Abo Fish (Sole Fish)
Stock Fish
METHOD ONE
Wash and boil your meat with onion. Add seasoning cubes and salt. Cook for 15-20 minutes.
Add your banga sauce, stock fish, smoked fish, pepper and crayfish. Leave to boil for 15 minutes. The mixture would get thick. Don’t forget to taste.
Add the ground leaves and stir. Allow to cook for 5 – 7 minutes.
Serve with your preferred choice of swallow.
METHOD TWO
INGREDIENTS
Ingredients
Bunch Scent leaf
Bunch Pumpkin leafs
Bunch Uziza(hot leaf)
Bunch Ebeewuwa
Bunch bitterleaf (parboiled before use)
Palmnut extract(optional)
2/3 Cooking Spoon palm oil
Cubes Seasoning
Salt
Dry bony fish pieced
Handful crayfish blended with the leafs
Locust beans
Goat head pieced or other meats of choice
Blended fresh peppers
Fresh Pumpkin (Ugwu Leaf)
Fresh Uziza Leaf
Fresh Ebeewuwa Leaf
STEPS
Choose three from the listed leafs Wash and blend the leafs with the crayfish and pepper to a smooth paste using water.
If using bitterleaf boil with potash and rinse it before blending
Cook the meats with water and add the blended leaves to the meat stock
Add palm oil, salt, pieced bony fish, seasoning to taste.
The consistency for the soup shouldn’t be a bit light and not thick.
For that real taste of this soup choose from scent leaf, Uziza, bitterleaf, ebeewuwa.
Stir and allow to simmer for like 3 minutes. At this point your delicious Esan Edo Black soup is ready.😋
Serve hot and enjoy with choice swallow like Fufu, Garri, Pounded Yam, and Semolina!🥰❤️
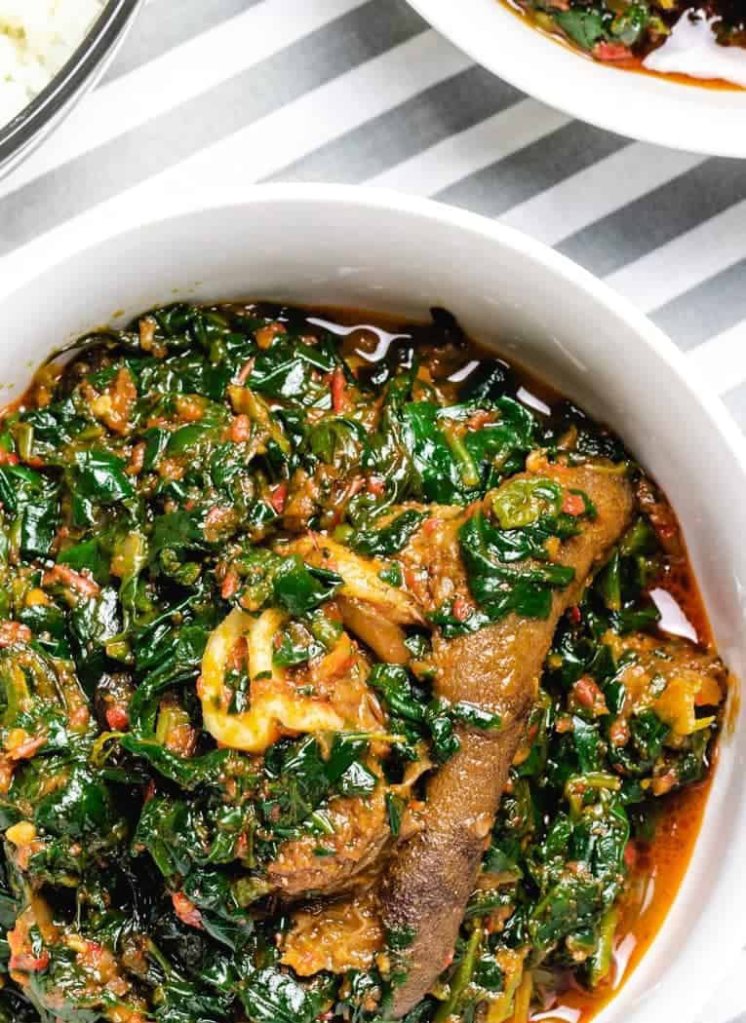
One of my favorite dishes. The combination of tender greens like efo-tete (green amaranth) and young ewuro (bitter leaf) with locust beans, flaky mackerel fish and palm oil is sure to please any palate.
The bitter leaf used in this recipe should be washed to remove some of the natural bitterness. Most local markets sell bitter leaf that has already been stripped of a certain degree of bitterness; however, if you are one of the many Nigerians who grow bitter leaf but aren’t necessarily sure how to wash it, here are two options:
1) Hand wash
Place bitter leaf in a basin of water. Gather up a little at a time and rub together under the water. Continue to do this until the leaves are fairly wilted. Use a mesh strainer to remove excess water. Repeat this process 2-3 times. Rinse the bitter leaf with fresh water, strain and set aside for use.
2) Blender or food processor
Begin by chopping the bitter leaf. Combine 1 part bitter leaf with 2 parts water. Blend for 2-3 minutes, then strain to remove water. Repeat this process 2 more times. Pour the mixture through a fine mesh strainer and allow to rest for 10 minutes to drain excess water.
INGREDIENTS
3 red bell peppers (tatashe)
1 medium onion bulb
2-3 Scotch bonnet (ata rodo)
2/3 cup palm oil
1/2 medium onion bulb, thinly sliced
2 tablespoons blended crayfish
1 cup shredded smoked fish (optional)
1-2 large mackerel fish (titus), cleaned and cut into steaks
(Note: 7-8 cups of fresh bitter leaf will yield approximately 3 cups washed.)
INSTRUCTIONS
Season the mackerel with salt and pepper and set aside.
Heat the palm oil in a large pot over medium heat.
Add the sliced onions and fry until fragrant and browned.
Add the mackerel and fry on both sides.
Add the mixture from Part A and the remaining ingredients from Part B.
Cover and simmer on medium-high heat for 15-20 minutes.
Remove the mackerel and set aside.
Add the bitter leaf and amaranth; stir well to combine with the sauce. Continue to stir until the vegetables are wilted and reduced. Taste and adjust seasoning if desired.
Return the mackerel to the soup. Simmer uncovered for another 2-3 minutes.
Serve and enjoy!😋 ***Soup wéh Sweet***
Bitter leaf soup can be enjoyed as an accompaniment to pounded yam, amala, plantain, fufu, and so forth. It can also be served on rice or eaten with a side of boiled plantain.
Never miss our delicious healthy recipes! Join our free weekly newsletter and get a bonus 10-day guide to a lean our village recipes and radiantly glow!🥰❤️
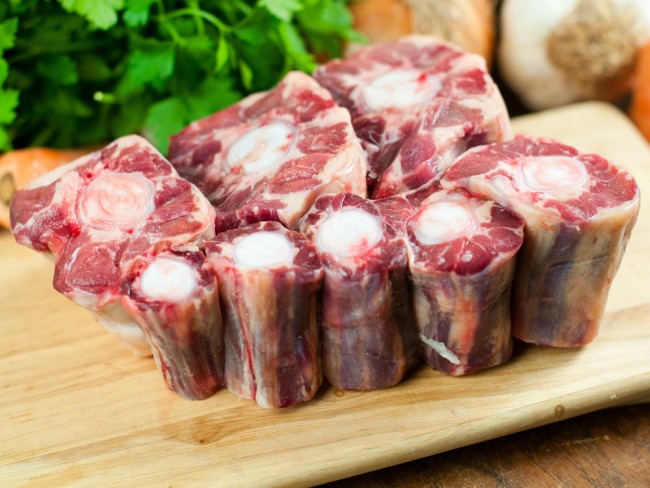
Urhobo Oghwo Soup is a delicious soup that Urhobo people from Delta State of Nigeria swear by. It goes well with yellow garri, starch, boiled yam, boiled cocoyam and boiled plantain. Whichever you like, Oghwo Soup will not disappoint!
INGREDIENTS
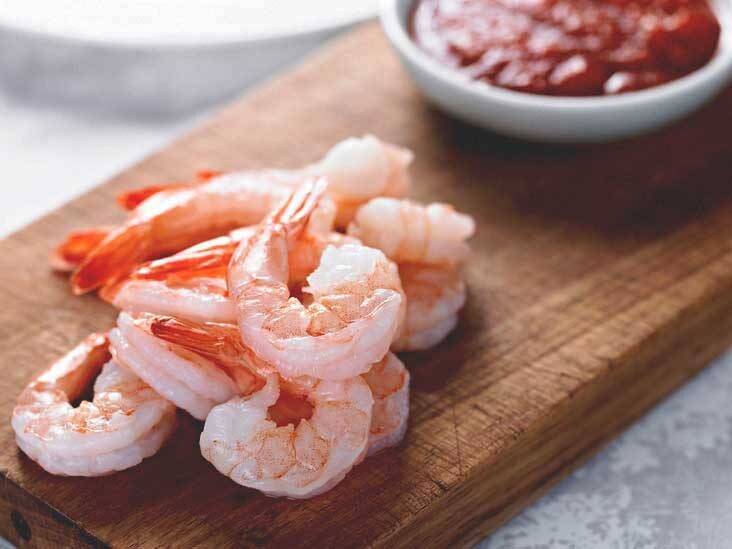
• Assorted Meat and Fish (Beef, Cow Strip, Snail, Shell Fish, Ponmo)
• 250g Palm Oil (Ofigbo) native palm oil
• 1 medium sized lump Potash (Ughweri, Keun, or Akanwu) ughweri preferably
• 2 Big Dried Fish (Shell Fish, Stock Fish, Stock Fish)
• Crayfish (grounded)
• Shrimps
• 1 tbs grounded chilly pepper (dry)
• 200g Garri or Starch as thickner
NOTE: If using Garri, use 2 hand full and ensure to sieve to finest particle)
• Seasoning Cubes
• Salt to taste
INGREDIENTS
The secret of Oghwo Soup is patience and low heat fire🔥
METHOD OF PREPARATION
Soak the dry fish to soften.
Mix the potash with a little amount of water and set aside.
Clean, debone and separate the dry fish into medium pieces.
Pour the palm oil in a small container, gently decant the potash water into the palm oil while stirring at the same time till the palm oil turns yellow and becomes thick.
Cook the meats and stockfish with the seasoning cubes till soft.
Blend the garri with a dry mill then mix it with some meat and fish stock to get a soft dough.
Add the dry fish, crayfish and pepper to pot, cover and continue cooking.
After about 7 minutes, add the palm oil mix and scoop small lumps of the garri dough into the pot and continue cooking. Do not cover it from the point onwards because it will boil over due to the edible potash in the palm oil.
It is done when the lumps of garri have disolved and the soup is no longer foaming. If you get the consistency you like for your soups before the garri lumps completely dissolve, remove the excess lumps.
Stir very well and take it off the stove.
Alternatively;
1. Wash and soak the dry fish with hot water to soften.
2. Mix the grounded potash (ughweri) with little amount of water and set aside.
3. Rinse and debone the dry fish into medium
4. Pour the native oil into a small container and gently decant the potash oil into the the native oil while stirring till the oil turns yellow and thick.
5. Cook the meat and stock fish with seasoning cube for 10 – 15 minutes. tishpieces ground pepper to taste, salt, seasoning cubes, water and palm oil.
Cow leg
Cow tail
Cow Kidney
Cow Heart
Cow Liver
Cow Tongue
Honeycomb Tripe/Saki
Fresh Cow Skin/Ponmo
Dry Shrimp
Fresh Shrimp
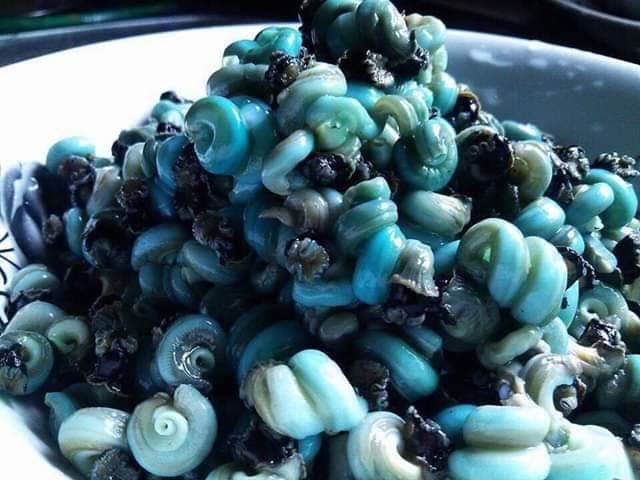
Fresh Snail
Fresh Periwinkles
Cow Strip Steak
Cow leg, Cow tail, Kidney, Heart, Liver, Tongue, Honeycomb Tripe (Saki/Shaki), Cow Skin (Ponmo), Fresh/ Dry Shrimp, Fresh Snail, Periwinkles, Cow Strip Steak… Note: You can use cow intestines of your choice😋
4. Now add your starch or finely sieved garri into a bowl.
5. Get the potash (ughweri) pound the ughweri to finely smooth and add to the garri or starch (soak with a cooking spoon of water).
6. Add stock from the pot to the presoaked garri or starch concentrate and stir thoroughly until moisture.
7. Add concentrate to the pot and continuously on low heat to avoid foaming out of the pot (this is called Érioò in Urhobo)
8. Allow to cook for 5 minutes and bring down, now it is ready to be served with Starch (Usi), Boiled Yam or Plantain, Garri (Eba), Pounded Yam or Casava Fufu😋🥰
Yes, it is again that time of the year when we need to protect our body against the nasty cold and unfortunately this year we have to fight also against the COVID.
Now more than ever, it’s important for our immune system to stay in excellent shape during the raining season.
And guess what is one of the best ways to stay healthy?
Maintaining a nutritious diet🤔🥰
Yes my dear friends, we’re talking again about food.
Delicious and Nutritious Food!
There’s not a secret anymore, vegetables and fruits are our allies always.
Now let’s see what soup we can make with this best immune system-booster-food.
NUTRITION FACTS
Spinach is a superfood with just a few calories but loaded with nutrients.
It is a good source of vitamin C, carotenoids, folic acid, chlorophyll and lutein, giving it antioxidant properties and making it a useful food for eye health, protecting the eyes from UVA damage that can cause cataracts, useful for those suffering from atherosclerosis, for pregnant women and for the protective action against coronary pathologies.
It is suitable for those suffering from constipation or anemics.
Spinach bring benefits to the immune system and increase the production of red blood cells.
It is useful in cases of hypertension and prevent high blood pressure. It also bring benefits to the health of bones and skin. Thus it reduces the risk of developing gastric ulcer and inflammation of the digestive system.
If you would like to discover more about spinach, its origins, cultivation, uses and benefits you may enjoy the below.
INGREDIENTS
EFO-RIRO
Efo-riro (Nigerian Spinach Stew) is a Yoruba word and it loosely means ‘stirred spinach’. In Nigeria, the vegetables used for Efo-riro are ‘Efo Shoko’ (Lagos spinach) or ‘Efo Tete mouthwatering, savory, African stew made with spinach and is oh so flavorful! Who knew spinach could taste so good?
Spinach: I use roughly 8 cups of chopped spinach. You can use fresh or frozen spinach.null
Meat: You can use beef, lamb, goat meat, chicken, smoked catfish, tripe (shaki) or any meat of your choice, or even mix and match! For a vegan option, you can leave out the meat or use mushrooms.
I made mine with goat meat and mushrooms, and even though efo riro does not traditionally use mushrooms, I wanted to show just how versatile this stew is.
Palm oil: The traditional recipe calls for palm oil but I have made this spinach stew with olive oil and it still turned out delicious!
Vegetables: Plum (roma) tomatoes, red bell peppers, habanero peppers, and onions. Plum tomatoes are best for Nigerians stews because they are denser and have less juice.null
Broth: Just a bit for flavor and to reduce the chance of the stew burning when using fresh spinach.
You can omit this if you don’t have any. I also use crushed red pepper flakes as an optional garnish.
HOW TO MAKE EFO-RIRO
Start by cooking whatever meat you decide to use. I prepared my goat meat by rinsing it over running water and boiling it with about a teaspoon of salt, bouillon and black pepper. Let it boil until it is tender.
Blend the tomatoes, red bell pepper, habanero pepper, and half of the onion together using a food processor. Chop up the other half of the onion and set aside.null
If using fresh spinach, chop it up into smaller pieces and rinse in a colander, squeezing out as much water as you can. Leave it in the colander while you start cooking so that the excess water will drain out.
This will help prevent the spinach stew from becoming watery.
I like to use fresh spinach for this but frozen will work too. If using frozen, microwave for a few minutes till it begins to thaw out and drain the excess water.
Also, wash and drain the mushrooms (if using mushrooms).
TOMATO,PEPPER SAUCE
Heat 1/2 cup of palm oil in a pot on medium heat, add in your onions and stir for about 2 minutes. Add in your blended tomato and pepper mix and add in your spices after about a minute. You can use only 1 tsp of cayenne pepper if you want it less spicy.
If using fresh spinach, add 1/4 cup of broth/stock. You can use water if you don’t have any but will need to adjust the spices.
If using frozen spinach, do not add any water as frozen spinach already contains water.
Add the goat meat and mushrooms and any other meat of choice and let it cook for another 5 minutes so it can soak up the flavors.
TOMATO MEAT SAUCE
When it begins to boil, add in the spinach. It will most likely fill the pot and look like it might spill over but it wouldn’t.
Stir intermittently over a period of 5 minutes and the spinach will shrink considerably. Taste for salt and add more spices if you desire.
I like mine just slightly chewy so I don’t leave it in for more than 5 minutes but if you like it softer, you can leave it for a few more minutes on low heat.
This recipe serves 8 and contains 5 net carbs per serving. It stores well in the fridge for about 5 days and you can also freeze it.
TIPS
• Only add the stock/water if using fresh spinach.
• You can leave the spinach in for about 5 mins more on low heat if you want it softer and less chewy.
• If you want the spinach stew to be less spicy, use only 1 tsp of cayenne pepper (or 1/2).
Blend tomatoes, red bell pepper, habanero pepper and half of the onion together using a food processor.
Chop up the other half of the onion and set aside.
If using fresh spinach, chop it up, wash and squeeze, and leave in a colander. If using frozen spinach, microwave for a few minutes.
Wash and drain the mushrooms.
INSTRUCTIONS
Heat ½ cup of palm oil in a pot on medium heat, add in your onions and stir for about 2 minutes.
Add in your blended tomato and pepper mix and stir for about a minute.
Add the bouillon powder, crayfish, black pepper, cayenne pepper and salt, and cook on medium heat for 5 minutes.
If using fresh spinach, add ¼ cup stock or water and bring to a boil.
Add the goat meat, mushroom, and any other meat you desire and let boil for another 5 minutes.
Add the spinach and stir intermittently for about 5 minutes.
Add more salt or spices if desired.
Garnish with red pepper flakes, if you want it spicier and enjoy!
NOTES
This recipe serves 8 and contains 5 net carbs per serving.
Only add the stock/water if using fresh spinach.
You can leave the spinach in for about 5 mins more on low heat if you want it softer and less chewy.
If you want the spinach stew to be less spicy, use only 1 tsp of cayenne pepper (or 1/2).
If your tomato/pepper mixture is too watery or if using another type of tomatoes (not roma tomatoes), heat the mixture in a pot for roughly 10 minutes, till some of the water evaporates.
If you’ve always love snacks with cheese-based recipes, then this could just be an opportunity for you to learn an an easy and simple recipe to prepare a rennet and calcium citric acid-free cheesy mozzarella cheese. it is an ideal recipe to be prepared at home which can be used in different types of recipes like pizza, pasta and choice of deep-fried snacks. the basic ingredients for this recipe are unhomogenised full fat cream milk and white vinegar to curdle the milk.
furthermore, i would like to highlight some more tips, suggestions and variations to homemade cheese recipe. firstly, i would like to heavily emphasize on the timing and temperatures used in this recipe. you need to follow the exact timing and temperature to get the proper texture of cheese. otherwise, it may easily turn to paneer. secondly, the milk has to be full cream with 4% of fat or more, you may need to scan through the ingredients section and see the fat percentage in it. lastly, the quantity of vinegar might have to be increased depending upon the quality of milk. when i make paneer, i use a quarter cup of vinegar to spoil the milk. as the fat percentage increases, you may need more vinegar to spoil it. hence do not panic if it does not spoil completely and add more vinegar to it. also, if you have access to rennet or citric acid, you should be good using it. both rennetand citric acid give more thickness and elasticity to the cheese.
finally, i request you to check my other cooking tips, tricks, methodsrecipes collection with this post of cheese recipe. it mainly includes my other detailed recipes like how to make butter, ghee, & whipped cream from cream, badam powder, 5 things you are doing wrong in the kitchen and how to correct it, how to clean & maintain cast iron / skillet pan, how to make paneer at home, top 6 health benefits of mint leaf, tutti frutti, top 7 health benefits of curry leaves. further to these i would also like to mention my other recipe categories like,
Snacks recipes
Breakfast recipes
Sandwich recipes
STEP 1: Take 3 litre full cream milk. make sure the milk is unhomogenised or use any raw milk.
STEP 2: Stir continuously and heat the milk until it turns lukewarm. the temperature of the milk should be approximately 45 degree celcius.
STEP 3: Now turn off the flame and add ½ cup vinegar.
STEP 4: Stir for exactly 25 seconds. do not over stir as the curd formed may break.
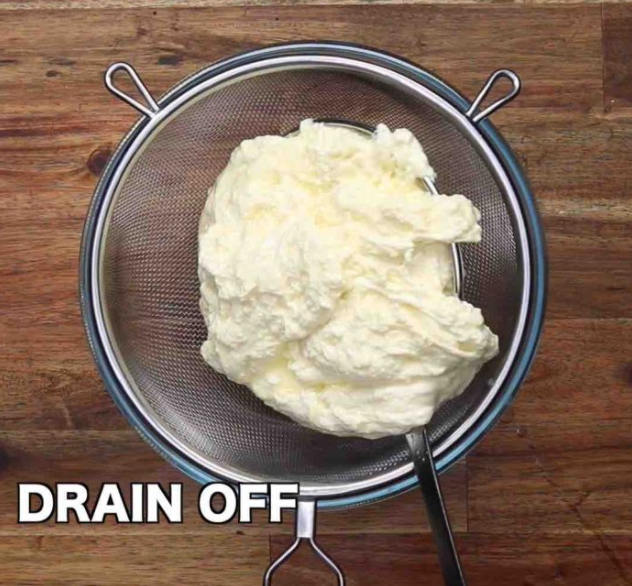
STEP 5: Cover and rest for 20 minutes or until the curd is formed and whey separates completely.
STEP 7: Take the whey water and add 1 tbsp salt. stir well.
STEP 6: Drain of the curds over the colander and squeeze gently.
NOTE: This is an ideal recipe to be prepared at home which can be used in different types of recipes like pizza, pasta and choice of deep-fried snacks. the basic ingredients for this recipe are unhomogenised full fat cream milk and white vinegar to curdle the milk.
STEP 8: Heat the water well, but do not boil. the temperature of the water should be approximately 80 degree celcius.
STEP 9: Turn off the flame and drop in squeezed curds.
STEP 10: Stir and dip in hot water for 5 times. squeeze gently removing excess water.
STEP 11: Dip again dip in hot water for 5 times.
STEP 12: Continue this step until the curds turn cheesy and smooth. do not over stretch as the cheese turns rubbery.
STEP 13: Dip in ice-cold water and rest for 2 minutes. this helps to set the cheese completely.
STEP 14: Crap the cheese in cling wrap and refrigerate for 2 hours.
Finally, mozzarella cheese is ready to use for 1 week when refrigerated.
Paneer or Cottage cheese is a very common ingredient across india and are used for different recipes. yet there are other types of cheese used in various kind of indian recipes which are typically store-bought. One of such popular cheese variation is the mozzarella cheese which can be a multipurpose cheese and can be used in myriad recipes.
OR
THE INGREDIENTS
Fresh Milk (Cow or goat): I prefer fresh, whole raw milk for the absolute best results. However, you can also use skimmed milk (2%, etc.) – though it won’t taste as creamy or rich, and even pasteurized milk. Avoid homogenized or ultra-pasteurized milk as they won’t work.
Rennet: You can use rennet tablets or liquid rennet (which allows you to skip a step). For a vegetarian version, you can use vegetable rennet.
Citric Acid: What I’ll be using as my curdling agent. I’ve experimented with other options but have yielded the best, most consistent results with citric acid. This is crucial as too little acidity will affect its ability to stretch and too much will lead to a grainy, lumpy mass.
Cheese Salt (aka Kosher Salt/ non-iodized salt): The lack of iodine means that it won’t inhibit the needed cultures/bacteria within the cheese.
Water: Used to help dissolve the rennet and the citric acid.
THE TOOLS NEEDED
While there are some general items you’ll need, such as bowls, spoons, and a large pot, there are a few more ‘specialized’ items you’ll need for this DIY including:
A digital thermometer (i.e., an instant-read thermometer) – You may not need this once you’ve had years of cheesemaking experience. However, for beginners, this tool is relatively inexpensive and makes a massive difference in achieving correct results.
Rubber Gloves – For the stretching steps, as the cheese will be HOT. Make sure to use ones that you don’t use for cleaning.
A Large Colander – for draining the cheese curds.
Cheesecloth – This isn’t 100% necessary, but lining your colander with cheesecloth makes for a FAR easies cleanup and is something I never skip.
THE STEP BY STEP INSTRUCTIONS
There are essentially three main ‘stages’ to making homemade mozzarella; first, is heating and acidifying the milk, second is curdling the milk to form curds, and finally stretching the curds and forming the mozzarella ball.
Here are the complete steps, though.
FIRST, PREPARE THE CITRIC ACID AND THE RENNET MIXTURE.
In a bowl, mix the citric acid and water and stir until dissolved.
Meanwhile, in a separate bowl, mix the rennet and water and stir well until dissolved.
Procedure
NEXT, HEAT THE MILK
Pour the milk into a large pot and add the citric acid mix. Warm the mixture over medium heat and stir slowly but continuously until the milk reaches 32ºC/90ºF. Remove from the heat as soon as you reach the required temperature.
SET AND CURDLE THE MILK
Add the rennet mixture to the warm milk and stir a few times slowly to mix well. Then cover the pot and set aside for 5 minutes.
Tip: If you can, stir in an up and down motion rather than swirling. The quicker the milk becomes motionless after the rennet is added and mixed in, the better as otherwise, it may not set correctly if it’s still whirling away. I aim for 15 seconds max of mixing.
After about 5 minutes, the milk should have ‘set’ and be a consistency similar to a thick yogurt or pudding that you can slice through. If you can cut through it nicely in a straight line, you can move to the next step. If not, set aside for another 5 minutes and try again.
NEXT, CUT THE CURDS INTO A GRID AND HEAT
It’s best to create a grid pattern through the curds, first slicing one way, then the other. Make sure to cut deep into the cuts, by touching the bottom of the pot.
Then, heat the curds over medium heat and stir very slowly but continuously. Try not to break the curds too much. They only need to reach 41ºC/106ºF, so they will warm up quite quickly (this heating will help the curds to toughen slightly).
Remove the pot from the heat as soon as the required temperature is reached. Continue to stir, slowly, for another 5 minutes. During this time, the curds will begin to separate from the whey.
NEXT, DRAIN THE CURDS
Scoop the cheese curds from the pot with a slotted spoon into a large colander lined with cheesecloth/muslin or a nut milk bag and allow the curds to drain into a bowl (as this whey can be used) for around 5 minutes.
Procedure
You can either set the whey aside now or use around half of it for the next step.
STRETCH AND SHAPE THE MOZZARELLA
Fill up a large bowl with hot water or heat up the whey liquid (until about 76ºC/170ºF) and place the curds inside. It may be easier to divide the curds in half and do this in two goes.
Note* Using whey instead of water and add a little extra flavor to the cheese.
Keep the curds in the hot liquid for a few minutes. This is when the mozzarella is taking shape – the curds should become stretchy, a bit smooshy, and look a little like melted cheese.
Note* You can also use a thermometer to check when the curds are ready to stretch. You’re looking for an internal temperature of 135F in the cheese.
Finally, remove from the hot whey/ water, add some salt and then stretch and fold the curds onto themselves (using gloves), like how you would with taffy. Repeat until they become shiny and firm (usually just a few folds will do like between 3-7- don’t overwork it). Then roll into balls and quickly cool them. (See in the video how I did it.)
If it’s hard to shape into a ball or comes apart while stretching, place back in the hot liquid and allow to heat up a little more to shape into the final, smooth ball.
HOW TO STORE:
Serve the fresh mozzarella immediately or store it in the fridge in the whey or a slated brine for up to a week.
You can also freeze the mozzarella for up to six months.
You can also easily grate the mozzarella to top your dishes.
RECIPE NOTES AND FAQS
If you use goats milk instead of cows, then be even slower and gentler when stirring the milk so as not to disturb the curds too much.
If your cheese is tough or crumbly, then this is likely down to using too much acidity or heating it incorrectly. However, it can also happen if the curds are broken up too much by rough mixing. Try to reduce the amount of citric acid in the next batch.
If the cheese is rubbery, then it’s likely that you overworked it during the stretching phase.
For a softer mozzarella, stop the curds from becoming as firm and work the cheese even less when stretching (literally just a couple of stretches).
You could add some dried herbs to the cheese, if wanted, during the final shaping stage.
TOP TIP: A ‘failed’ batch definitely doesn’t necessarily mean waste. Even if the cheese is crumbly and won’t stretch, this can be used within pasta dishes, into cooked dishes, etc.
Nigerian Banga Soup or Ofè Akwú is native to the Niger Delta (Urhobo People) and the South Eastern parts of Nigeria. In the Niger Delta areas, Banga soup is commonly eaten with various fufu recipes: Starch, Pounded Yam, Semolina, Garri and Cassava Fufu. In the South Eastern parts of Nigeria, Banga Soup is referred to as Ofe Akwu where Ofè means Soup / Stew and Akwú means palm fruit and is used mainly as stew for white rice. The palm fruit oil extract used in cooking Banga Soup / Stew is quite different from the red palm oil used in cooking Nigerian food recipes. Palm Oil is pure oil extracted from the palm fruit pulp at high temperatures while the palm fruit oil extract used for the Banga Soup is extracted at a very low temperature and is a mixture of oil and water. Palm fruit oil extracted for Banga Soup contains less saturated fat than palm oils.
Palm Fruits & Extract (Banga Juice)
Ofè Akwú is actually very easy to prepare, as long as you get the basic requirements right. To achieve a very tasty result, your meats must be very well seasoned as the stock will be incorporated into the soup. Ogiri Okpei or Dawadawa, where Okpei is not available, is also very important as this enhances the taste of the Soup, well, once you can get past it’s lovely smell….?
Ogiri Okpei & Dawadawa
Ofè Akwú can be prepared with either Fresh fish on it’s own or with meats. I prefer to use just meats but for the sake of this recipe, I’ll add fresh fish, just so I can explain how and when fish is added and also illustrate how I keep fish from breaking in the soup, especially when you’re working with boney meats.
Fresh Cat Fish
If you can’t source Ugu leaves, you can use Spinach or Kale. It’s pretty hard to source fresh Scent Leaves in these parts so I always use dried Efinrin/Nchawu. This, you can pretty much find in most African stores, Asian stores around here stock them as well or you can go for fresh Basil leaves. In place of Ogiri Okpei, you can use Dawadawa and if you cant’t find Dawadawa, you can go for Iru (locust beans) though I should mention, Iru is close but won’t give you the same taste as Ogiri OKpei.
Kale, Spinach & Ugu Leaf
For an explanation on how to extract palm nut juice from Palm Kernels, please check my Delta Banga recipe HERE.
Let’s start…
INGREDIENTS
600gms Assorted Meats
1 Medium Size Fresh Fish
100gms Piece Stock Fish
Smoked Fish (Optional)
400gms Palm but extract (Banga Juice)
1/4 Cup Washed/Dry Scent Leaves/Basil/ Effinrin
1/2 Cup Washed Ugu Leaves
2 Tablespoons Ground Crayfish
2 Knorr Chicken Cubes
Chicken/Beef Seasoning of your choice
Small Chunk Ogiri Okpei/ Dawadawa
3-4 Yellow or Red Scotch Bonnet (Ata-Rodo)
Salt to Taste
PREPARATION
Boil your meats on medium to high heat first, starting with tougher meats like Cow leg, Shaki, tough Ponmo. Season with 1 tablespoon ground crayfish, Knorr chicken cubes, your chosen seasoning and salt, then add softer meats like beef, goat meat, chicken. When all the meats are tender, add the stock fish and boil all till soft.
Blend/ grind your Scotch Bonnet and Ogiri/Dawadawa with water, you can also add Crayfish to the blend….
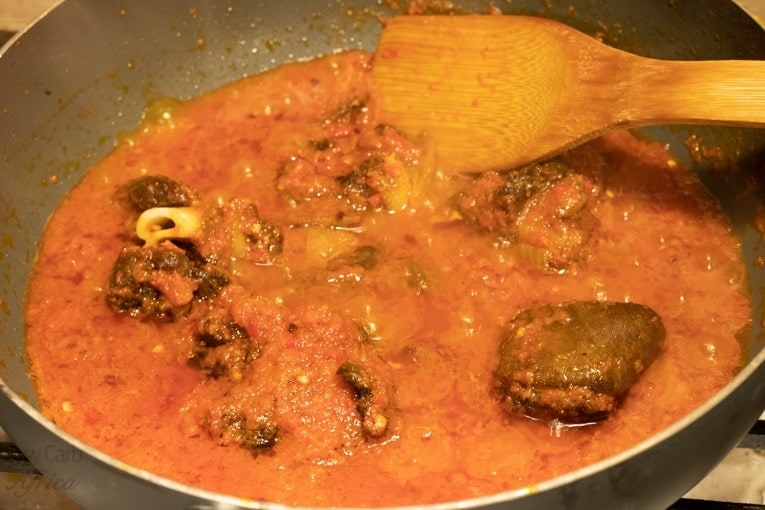
Pour the blend into the boiled meats, stir and combine, leave to cook for 2 minutes.
Turn the heat down to low, place a bigger pot on the hob, add the palm nut extract, then add the stock from the meats. If you haven’t got enough stock, add water, you’ll need the consistency to be quite fluid; a semi thickish consistency. Taste for salt/seasoning, add more if required….
NOTE:I didn’t need much seasoning as my stock was very well seasoned…
Try not to add too much Crayfish so it doesn’t mask the authentic Ofe Akwu taste.
Leave to combine for 5 minutes, then add the fresh fish. Leave to cook for 5-6 minutes
Take the fish out to prevent it from breaking in the soup. Now, add the cooked meats and crayfish, stir and combine, cook for 5 minutes…
Add the Scent leaves/Efinrin/Basil leaves, then the cooked fresh fish, leave for 2 minutes…
Add the Ugu leaves, stir and combine or just rock the pot back and forth a few times to combine so the fish remain intact. Switch the heat off….
Leave to simmer with the residual heat for 2-3 minutes, the oil will settle on the top at this time, and that’s it…See how gorgeous it looks? Trust me, the taste is just as gorgeous….
Serve your Ofe Akwu with boiled rice or any swallow of your choice…
If you’re interested, I’ve got a recipe for Delta version Banga soup, click HERE for the recipe.
Another tasty Igbo soup recipe on this blog is Ofe Nsala – White Soup, follow facebook our page to receive update for our next post on white soup recipe.
Don’t forget to subscribe to the blog for notifications of new recipes. See you in the next recipe.
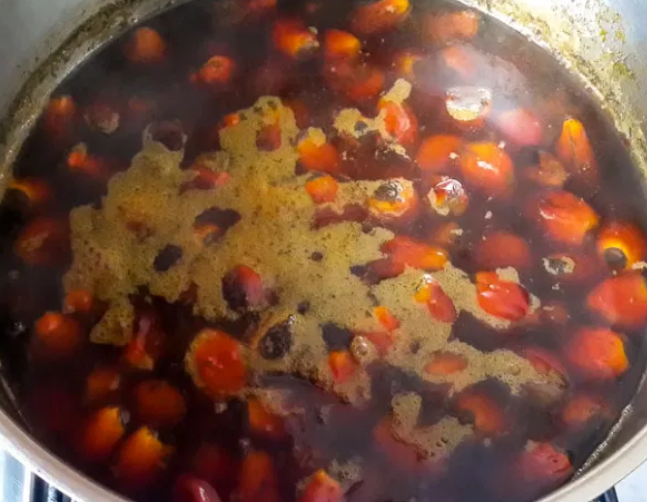
Wash palm nuts very well and place in a pot, add enough water to cover the nuts.
Boil for 30 minutes till the flesh of the palm nut is soft. It should easily split when pressed with the fingers.
Boiled Banga Fruits
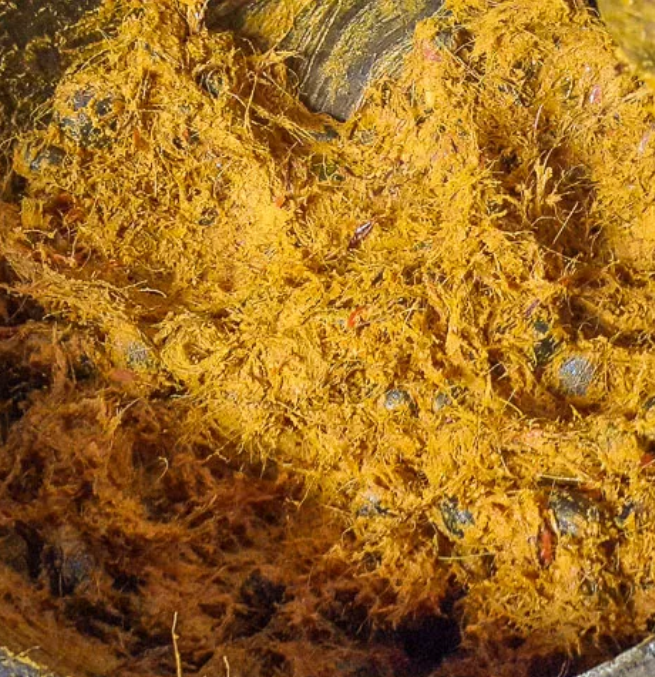
Drain palm nuts into a mortar, discarding the water it was boiled in. Using a pestle, pound while still hot to separate the flesh from the nuts and turn it into a pulp. The pulp should be a bright even orange colour at this stage. Try not to break the nuts, some might break but it won’t affect the taste.
Cooked Banga Fruits
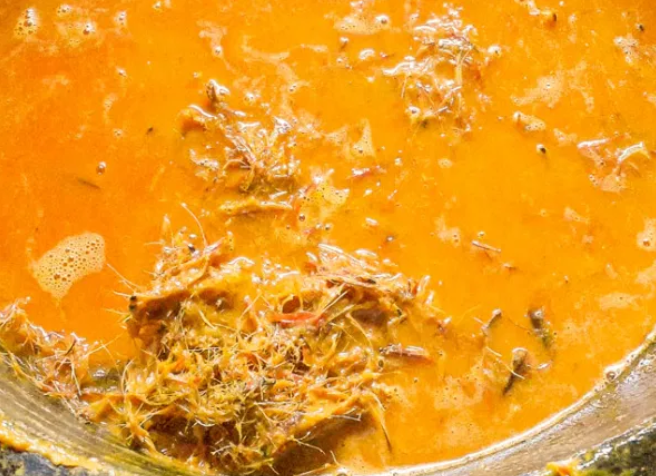
Scoop the pulp into a large bowl and add enough of the hot water to just cover the pulp. Leave to stand till it has cooled down enough to be handled.
Mashed Banga Fruits
Use your hand or a spoon to squeeze and stir it around a few times, pour into a sieve placed over another large bowl.
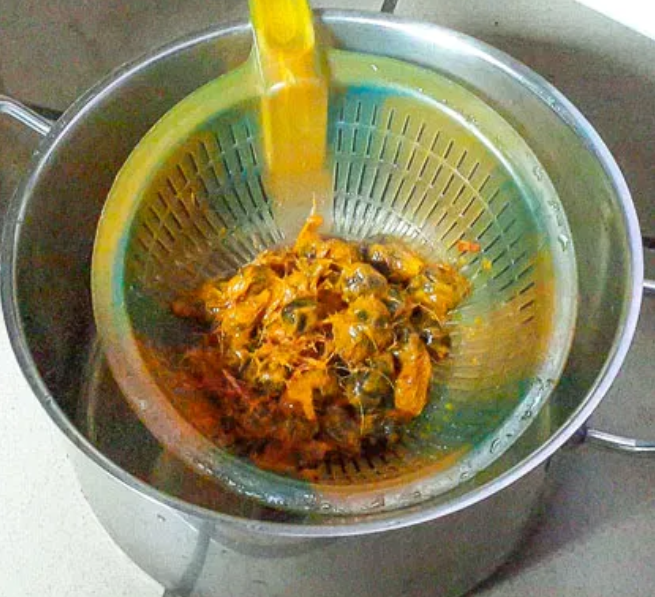
Chaffing Process
Squeeze out the juice still in the chaff, you can pick out as much of the kernels as you can to make this more efficient.
Juice Straining
If you have not worked the pulp well enough, you will still have quite some extract left in the chaff. Add a little more hot water and repeat the stirring and straining through the sieve. Strain the extract again. You will be left with this.
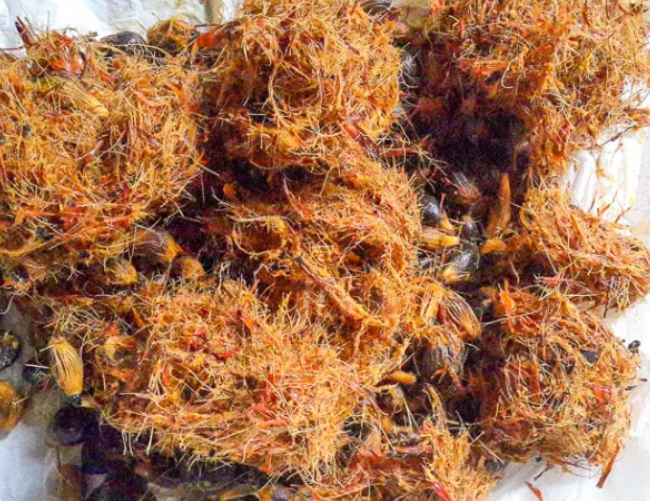
Separated Chaff & Nuts
Leave to stand for 1 minute to settle down, gently pour into a pot being careful not to pour in the very last bit of the extract to prevent any debris from entering the pot.
Banga Juice Extract
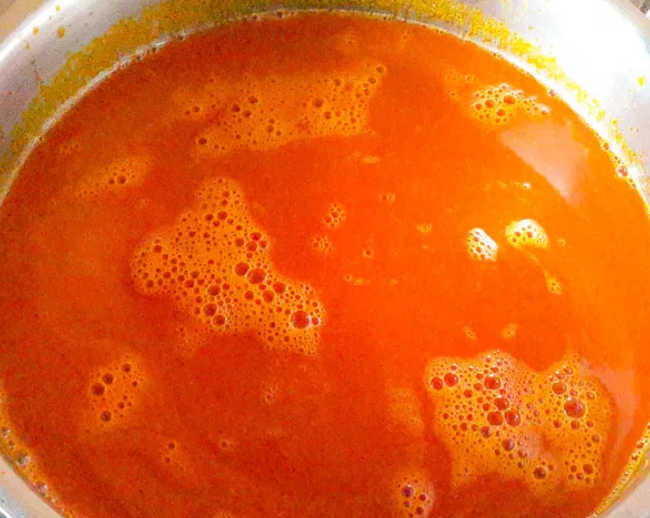
Boil over high heat to cook for about 10 minutes, you will start noticing red oil on the surface, your extract is ready, use for your recipe.
I normally make a large batch, then boil down to the consistency of custard or close to canned palm fruit concentrate.
Banga Concentrate
I store this concentrate in the freezer and rehydrate with stock and water when needed.